Welcome to part 4 of my do-it-yourself quilt along! So far we’ve gathered our supplies, sewn the blocks, and completed our quilt tops. This week we will piece our backings and baste our quilts so that our Jolly Jelly Roll Quilts are ready for machine quilting next week!
Step 1 – Piecing the Backing
 If you use one fabric entirely for your backing, sew together two lengths of fabric so that your piece is at least 5 inches longer and wider than your quilt.
For a 52″ x 52″ quilt top you would need 3 1/2 yards of fabric for the backing. Cut that into 2 equal pieces, each measuring 63″ long by 42″ wide. Sew those together on the selvedge edges with a half inch seam and you’ll get one piece that is about 63″ x 80″ – plenty of room!
I wrote up a post a few weeks ago on how to make a pieced quilt backing. With more than one fabric. You can read about that by clicking here.
 For my backing, I chose to use up all of my leftover jelly roll blocks plus some other chunks of fabric, about 3 yards total, to make it a little more artistic.
I sewed two rows of leftover blocks, then filled in with strips of pink and grey fabric from my stash.
The pink on the sides is much wider so a bunch of it will be trimmed off later.
(Don’t mind the wrinkles – I finished it just last night!)
Step 2 – Layering the Quilt
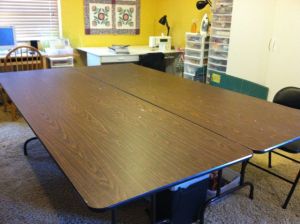 The most important thing you need for successful basting is plenty of room! I have two 8-foot tables set up in my sewing room at all times. I use them for cutting and basting.
First, you need to secure your backing; this is why you want it to be larger than your quilt top.
I do this by using office clips to secure the backing to the table. I use tape when the quilt backing does not reach the edge.

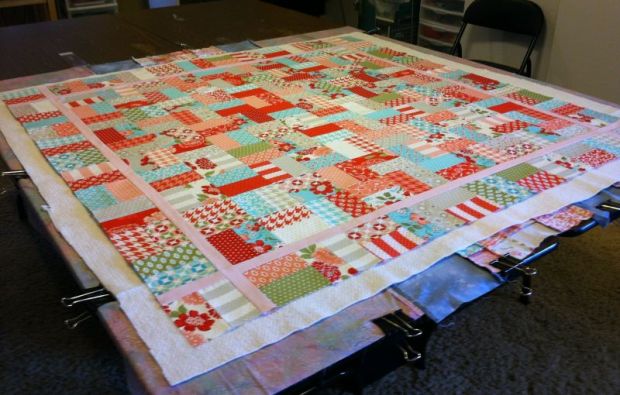
 Next, it’s time to spread out the batting. I used Warm-N-Natural cotton batting which does have a right and wrong side. The side with the flakes is the front side and the whiter side is the back side. Layer it right side up.
You can start with your batting folded up in one corner, then unfold the batting one step at a time if you are basting by yourself. Be sure to smooth it down so there are no wrinkles.


 You can click each of the pictures for a larger more detailed view.
Finally, it’s time to add the top! I don’t clamp down the top, but I do smooth it out and line it up as much as I can so that it is as straight and square as possible.
Now it’s just a matter of pinning the layers together so they won’t shift during quilting. My favorite basting tools are Pinmoor pin anchors. They are little rubber tips that fit on the end of straight pins. You can use any types of pins with them and the pins can jab anywhere into the hard rubber piece. They last forever and are so much easier to use than safety pins.
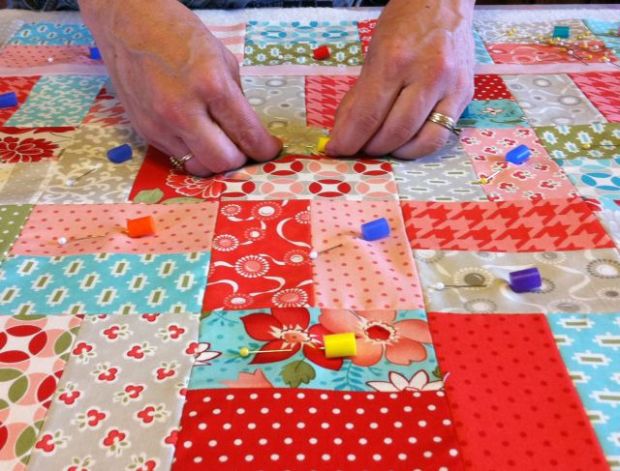 It took me about 150 Pinmoors to baste this quilt in under 20 minutes. If you are not ready to buy enough for a whole quilt, start with one package and baste part of your quilt. Baste the rest of your quilt with safety pins. Then, when quilting, take note of how much easier the pins and Pinmoors are to remove and you will be converted!
Here’s a great video you can watch on how to use them, made by the makers of Pinmoors.
Next week we will machine quilt this baby! That’s the best part of my do-it-yourself quilting tutorial; you are actually going to do it all yourself – no quilting by check here!!
Remember to send me pictures of your completed quilt tops. You can email me directly at Christa@ChristaQuilts.com. It’s “sew” fun to share!
Here is the complete Jolly Jelly Roll Quilt-Along Schedule:
Thank you for leaving this up on your blog. I was gifted with a lot of 2.5″ strips that are not from a coordinated jelly roll. It’s for American Heroes, and I think this pattern will be perfect!
Susan – this pattern will be perfect for that! When you are done with your quilt, be sure to post pictures of it on my ChristasQuiltAlong group on flickr!
I have just read your instructions for basting, where you say ‘next week we will be machine quilting’. Where can I get a copy of this?
Thanks Pam! I have gone back and added links to all of the tutorials in the post you you can easily find them now.
Well, I’m a little late for this section as my backing ended up another piecing project :-). It looks like I’m going to have a double sided quilt! I’ve also began using tables as the floor really messes up my body! What a relief. I actually set up my outdoor tables and laid everything out there. It worked! Since I”m in Southern CA I’ll be able to get away with this for a while.
Well, back to my piecing.
Those look neat! I’ll have to check them out. I use the special bent safety pins with a spoon to baste anything. The vintage modern looks gorgeous!
The pinmoors are so tempting! I also wish I had a big table as I tape to the floor. I’m too lazy to haul myself to the quilt shop and use their table. 😛
It took me awhile to claim enough space for my tables, but with some creative arranging throughout the house we were able to do it!
What a pretty quilt! I’m going to have to look into these pinmoor things… I wish I had a table I could secure my backs to – I end up taping the back of the quilt to my kitchen floor and then have to act like a madwoman keeping all the animals off while aligning and straightening all the quilt parts. 🙂
Yeah, Pinmoors are pretty awesome. A bit expensive, but I found that I could double my purchase by cutting each one in half so I had two shorter barrels, and I stick the pins in across the circle instead of into its axle. Works super!
Great tip, Lynette!